Windows Quick Start
Required Tools and Resources
- A Windows 10/11 PC
- A user account with admin privileges
- An internet connection
- A public IP address
- A text editor (Notepad will work but Notepad++ or VSCode is recommended)
- A browser that isn't Internet Explorer
Before you begin
- Connect your PC with ethernet instead of Wi-Fi
- Set your PC to never go to sleep automatically (Guide)
- Show file extensions in Explorer (Guide)
- Setup auto login for your user account if you haven't already (Guide)
- Make your media files accessible on this computer by this user
- Install latest updates (Guide)
- Setup remote access (optional). Popular options include Teamviewer, AnyDesk, RustDesk, Google Remote Desktop and Parsec
Notes
- How to open a Terminal from current location in Explorer
- Windows 10
- Right click on blank space while holding down
Shift - Click
Open PowerShell window here
- Right click on blank space while holding down
- Windows 11
- Right click on blank space
- Click
Open in Windows TerminalorOpen in Terminal
- Windows 10
Install Jellyfin
Install
-
Download installer exe and sha256sum from the official repo. The files to download are
installer/jellyfin_x.y.z_windows-x64.exe.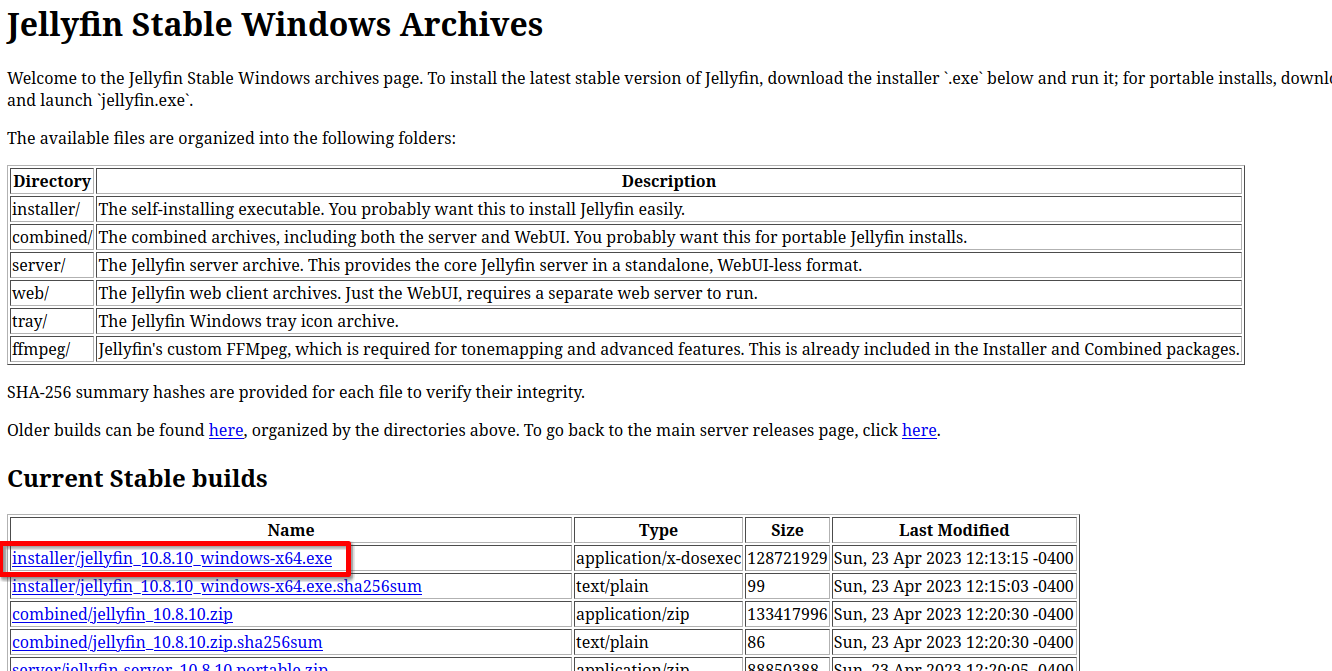
-
Run and follow the installer. Select
Basic Installwhen prompted. Do NOT selectInstall as a Serviceas it will break certain functions.
-
Close the installer after the install completes.
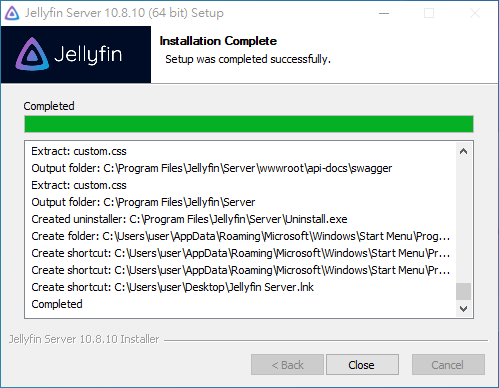
Installation Complete
-
Look for a Jellyfin icon in your system tray. If it isn't present, search for
Jellyfin Tray Appand run it. No windows will popup after running this application.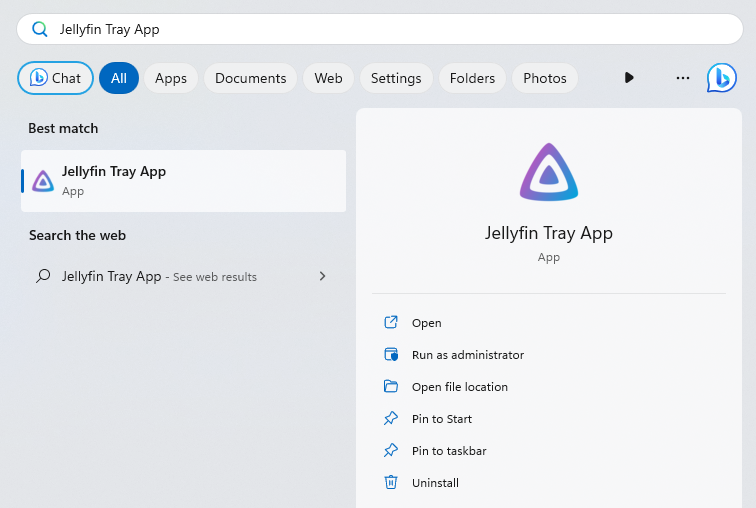
Jellyfin Tray App
-
Allow Firewall Access when Prompted
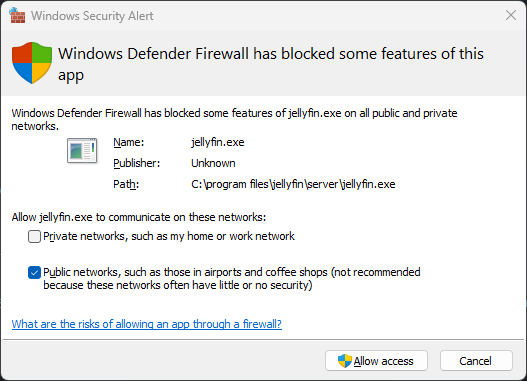
Windows Firewall Prompt
-
Open a browser and go to http://localhost:8096 to finish the setup process. Leave the
Enable automatic port mappingoption unchecked. Jellyfin's automatic port mapping feature uses UPnP, which can be a security risk and may not work on some networks. (Click here for more about UPnP and security)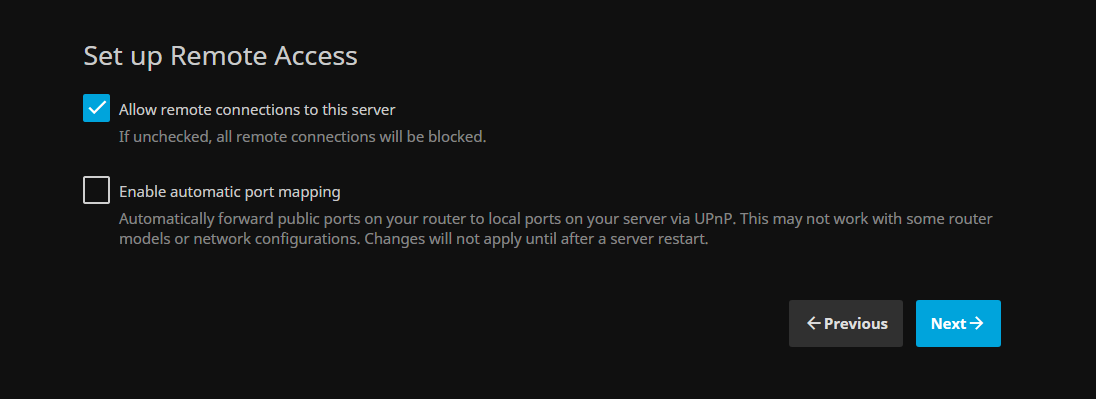
Remote Access Setup Page
Hardware Acceleration
Read the dedicated Hardware Acceleration page for how to configure hardware acceleration.
Reverse Proxy
A reverse proxy is a server that sits in front of other services and forwards client requests to those services according to predefined rules. They are usually used to help increase security, performance and reliability. Some popular options are Apache, Caddy, Haproxy, Nginx and Traefik. We are using Caddy in this guide for its simplicity. Info on other reverse proxy solutions can be found at Running Jellyfin Behind a Reverse Proxy.
Router Settings
-
Press
Win + R, entercontroland clickOKto open Control Panel
-
Navigate to
Network and Internet > Network and Sharing Center -
Click on the
Internet ConnectionunderConnections
-
Click
Detailsin the popup and note down theIPv4 AddressandIPv4 Default Gatewayvalues. TheIPv4 Addressis the LAN IP address of your Jellyfin server and theIPv4 Default Gatewayis usually your Router.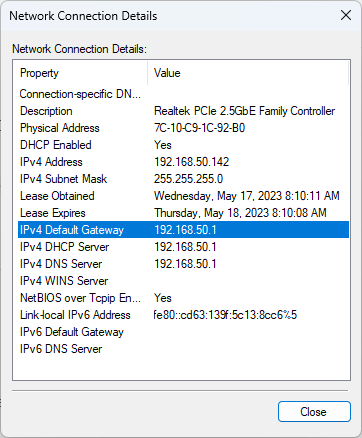
-
go to https://ipv4.icanhazip.com and note down the IP address
-
Go to the
IPv4 Default GatewayIP in a browser (for this example,http://192.168.50.1/) and Login to your router. If you do not have the credentials, look for them on the bottom of your router or online with the model number of your router -
Most Routers will show a WAN IP in the index. Check if the WAN IP matches the IP you noted down in step 5. If it doesn't, you do not have a routable IP address. In this case, you should stop following this guide and look for other options for remote access.
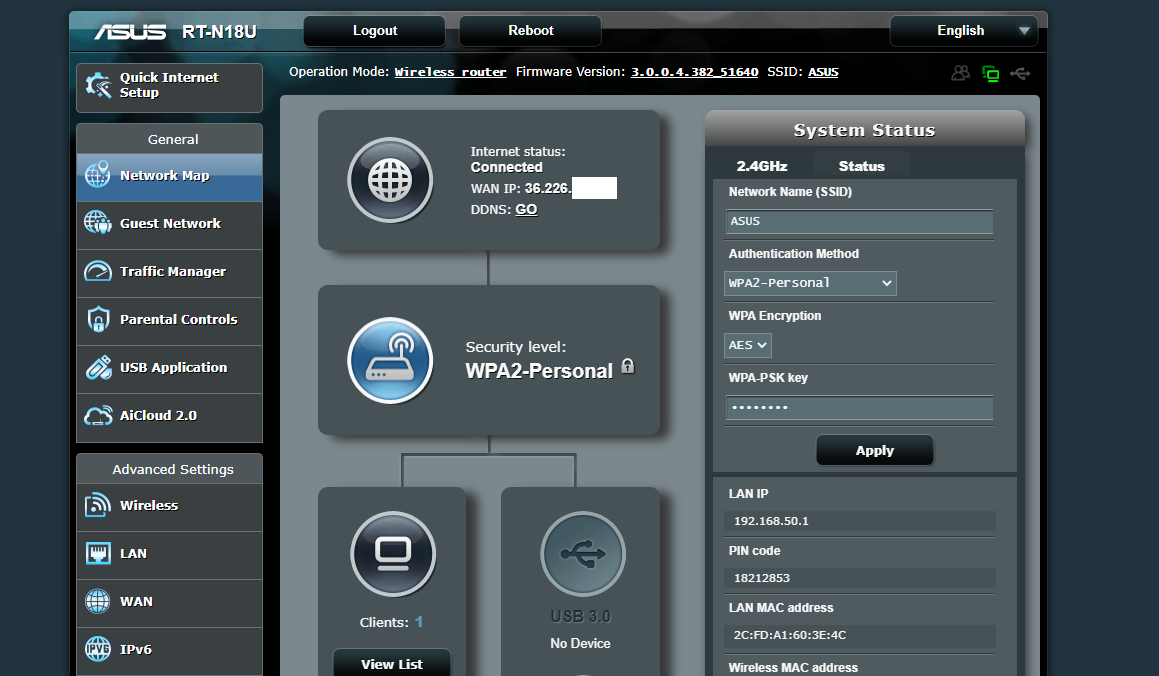
ASUS Router Settings Page
-
Assign your Jellyfin host a static local IP. The option is usually under
LANand namedDHCP ServerorDHCP. If you assign a different IP than what it currently has, you may need to reconnect the internet of this PC for settings to apply properly. In this case, I am assigning 192.168.50.142 to my PC.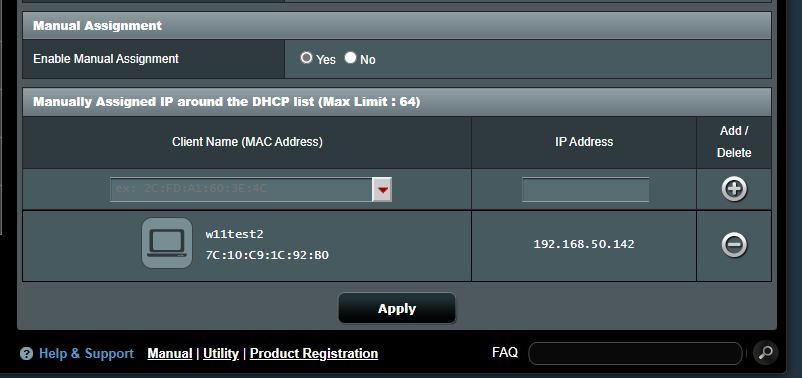
-
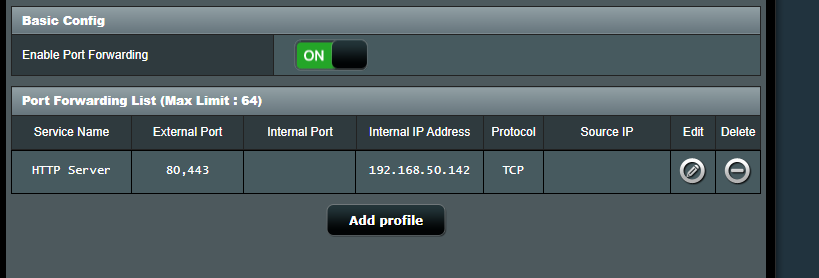
Find
Port Forwardingsettings in your router. This setting is usually underWAN,Firewall,SecurityorNATand usually namedPort ForwardingorVirtual Server.Port Triggeris NOT the setting you are looking for. -
Forward ports 80 and 443 to the IP you assigned previously
Install Caddy
-
Go to the official Caddy server download page
-
Choose
Windows amd64for the platform and click download. Leave the standard features checkbox checked. You do NOT need any extra features.
-
Create a new folder under
C:\Program Filesand name itcaddy. Confirm the operation if prompted.
-
move the downloaded exe file to the folder and rename it to
caddy.exe. Confirm the operation if prompted.
-
go to
This PCin Explorer, right click on blank space and click onproperties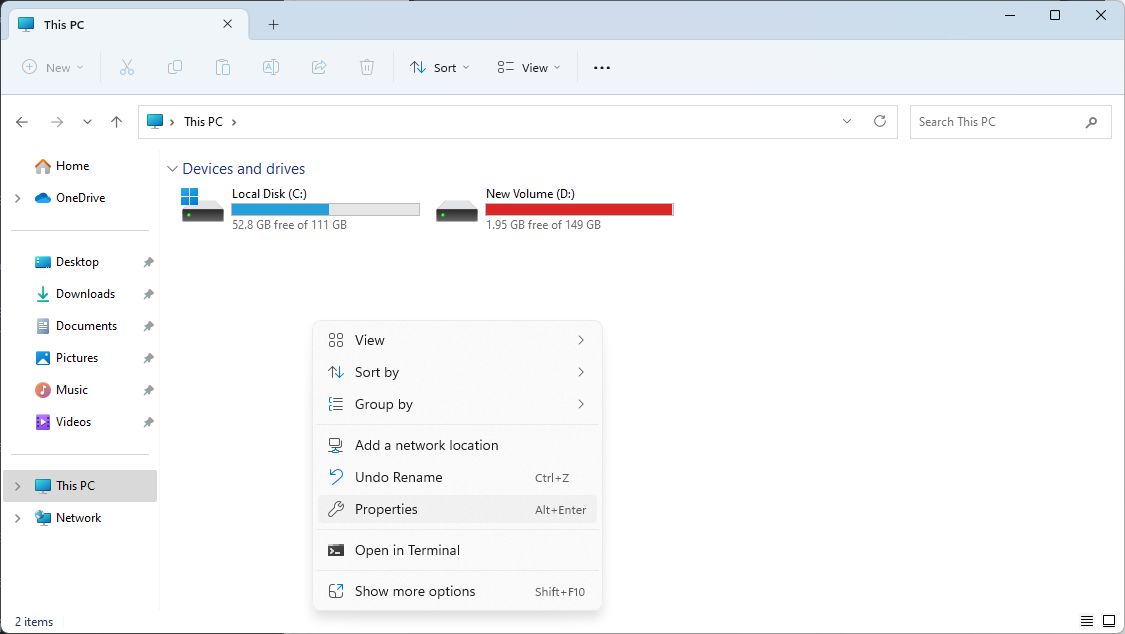
-
Click
Advanced System Settings. it will be afterDevice Specificationson Windows 11, or in the left sidebar on Windows 10 -
Click on
Environment Variablesin the popup and doubleclick onPathunder theUser variables for userin the second popup
-
Click on
Newin the popup and enterC:\Program Files\caddy, then clickOKon the bottom right. DO NOT change the other entries as messing with them can result in broken programs and/or a broken system.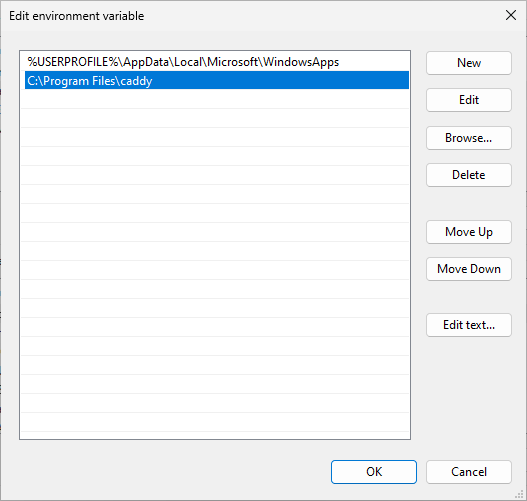
-
Click on
OKfor the other 2 popups to save and apply settings -
Reboot to make sure settings apply properly
Test if HTTP is routable
-
Open a terminal and run
caddy respond --body test --listen :80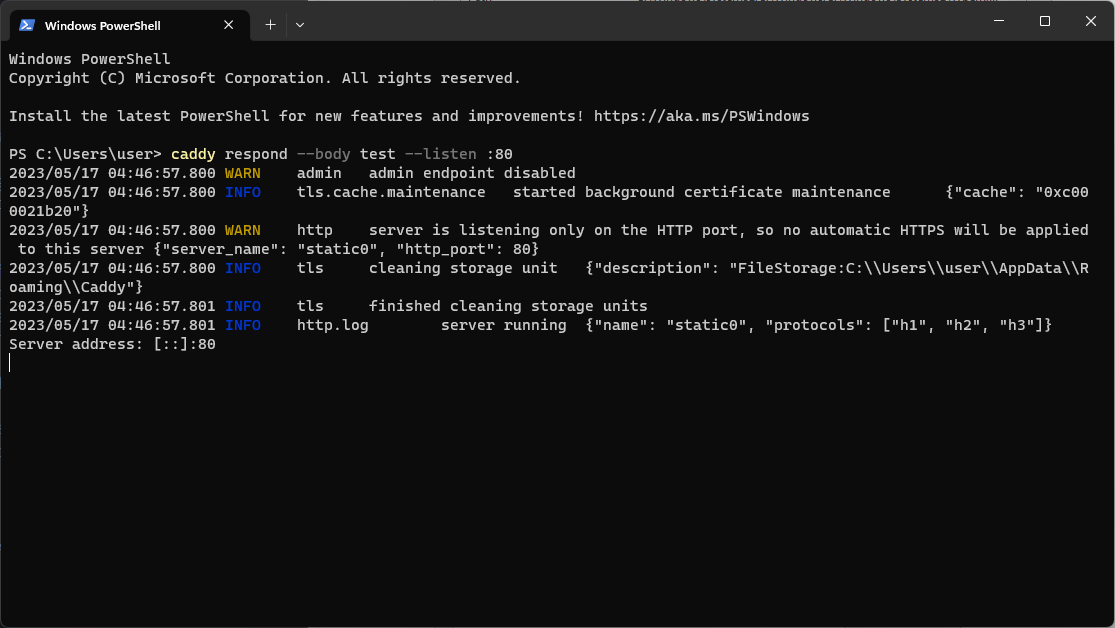
-
Allow access if prompted by Windows Firewall
-
Your IP may have changed while making the changes in your router. Go to https://ipv4.icanhazip.com to get your current public IP address

-
Attempt to access
http://<your IP here>using another internet connection on another device such as your mobile data. For this case, the IP has changed to1.171.xxx.xxxso I will be accessinghttp://1.171.xxx.xxxusing my mobile data on my phone. -
The page should look like the picture below. If it doesn't look this way or fails to connect, your ISP may be blocking incoming http connections or your IP is not routable. In this case, you should stop following this guide and look for other remote access options.
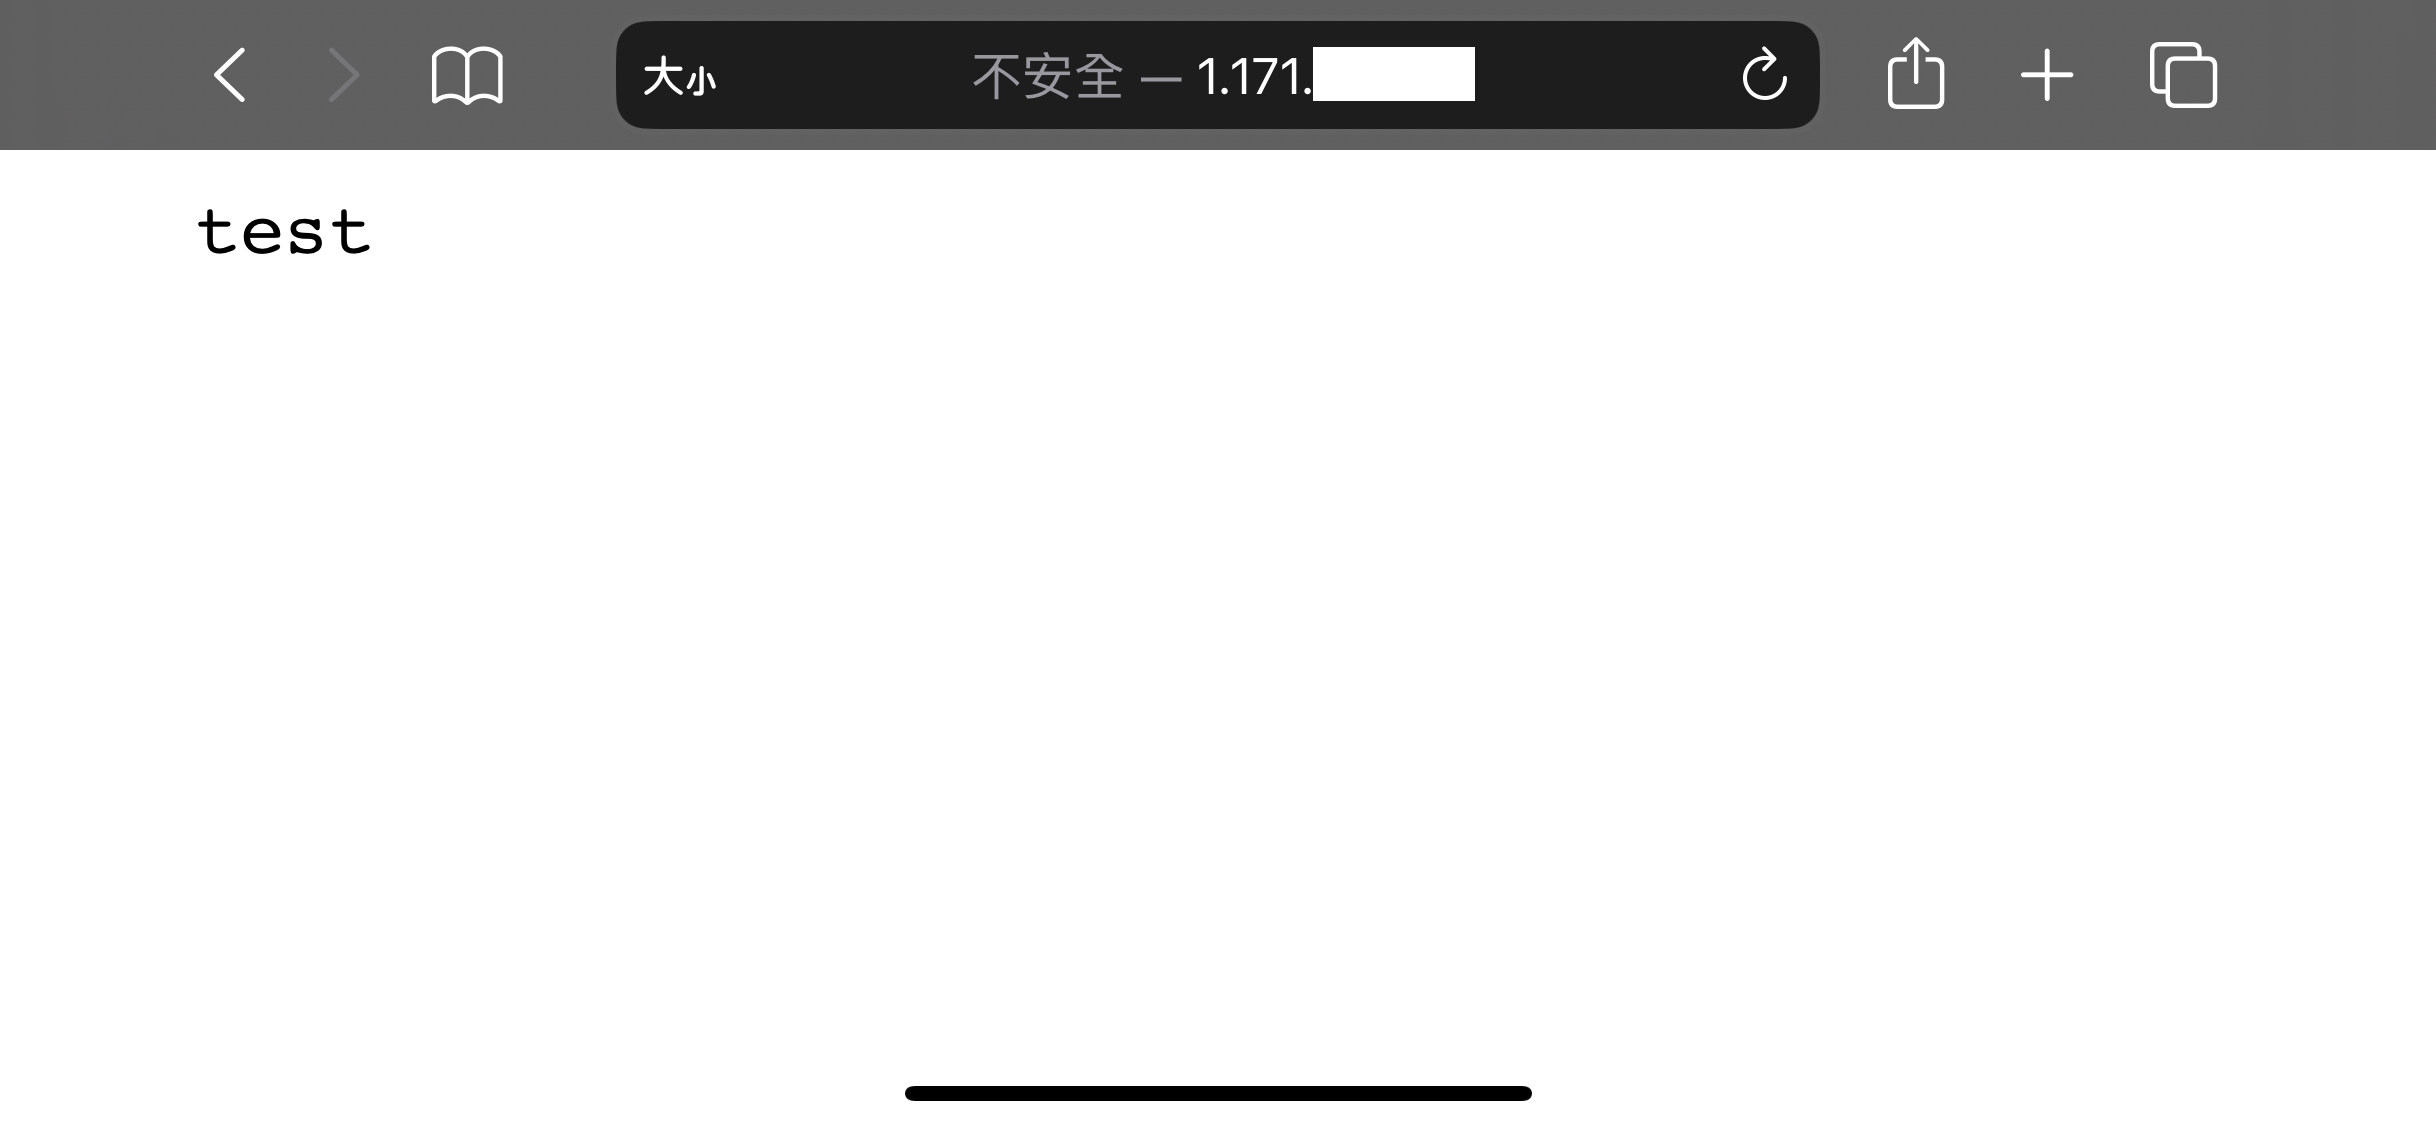
Screenshot taken on iOS using Safari
-
Press
Ctrl + Cin the terminal to exit Caddy, then close the terminal.
DDNS
-
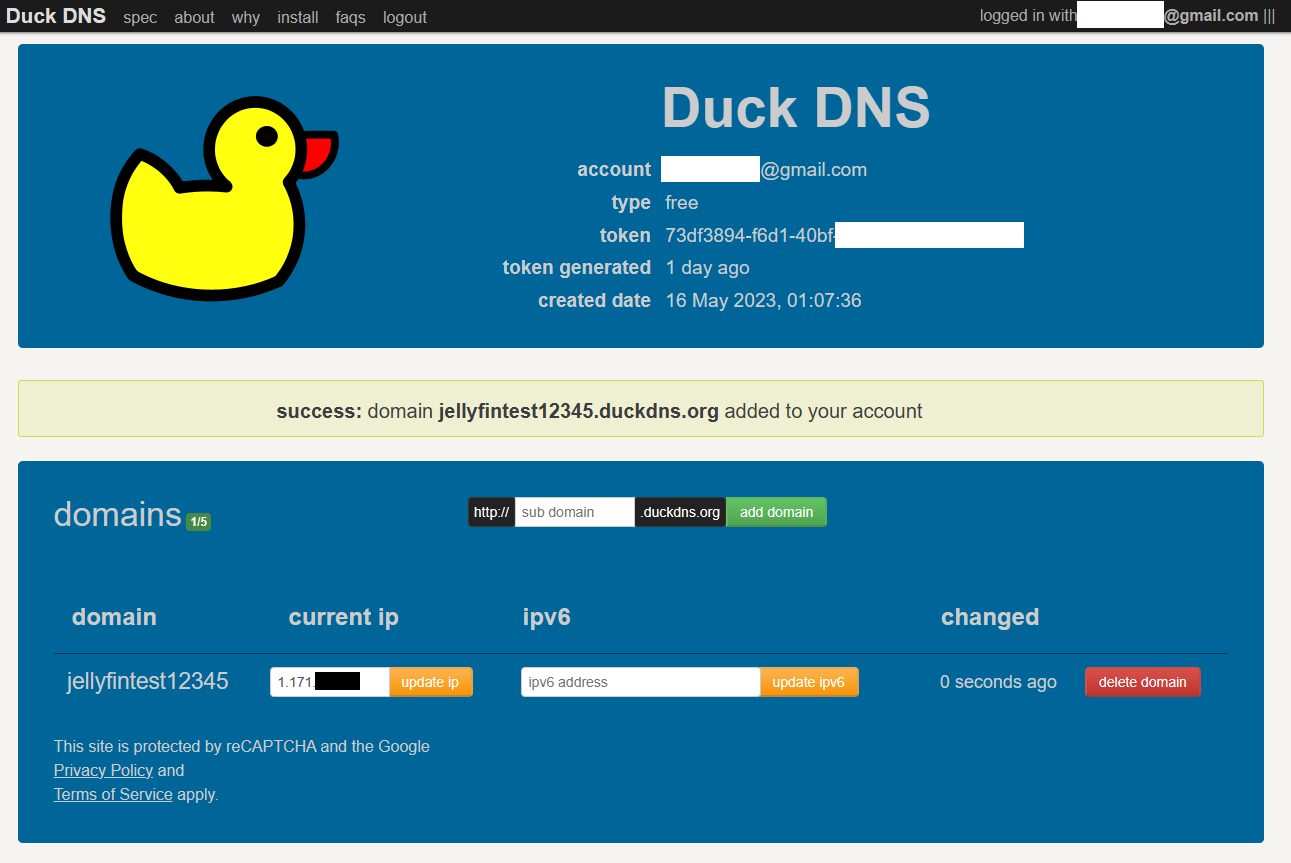
Login to DuckDNS on the top right at the DuckDNS homepage
-
Add a new domain in the middle. I am using jellyfintest12345.duckdns.org for this example but you can use anything as long as it hasn't been taken
-
Download the latest Windows C# client zip from its Github releases page
-
Create a new subfolder under
C:\Program Filesand name itduckdns
-
Unzip the downloaded file and move the
DuckDNS.exeinto the folder. Confirm the operation if prompted.
-
Run
DuckDNS.exe -
Enter the Domain you just created and the Token from your DuckDNS dashboard, change interval to
5mand click onOK
-
Make sure that no errors appeared and there is a yellow duck in your system tray. If the duck is red, check your configuration.
-
hit
Win + R, entertaskschd.mscand clickOK
-
Click on
Create basic taskon the right panel. -
Enter a descriptive Name and a description, one that you can identify in the future and click next
-
Choose
When I log onfor the Task Trigger and click Next -
Choose
Start a programfor the Action -
Enter
C:\Program Files\duckdns\DuckDNS.exein the Program/script field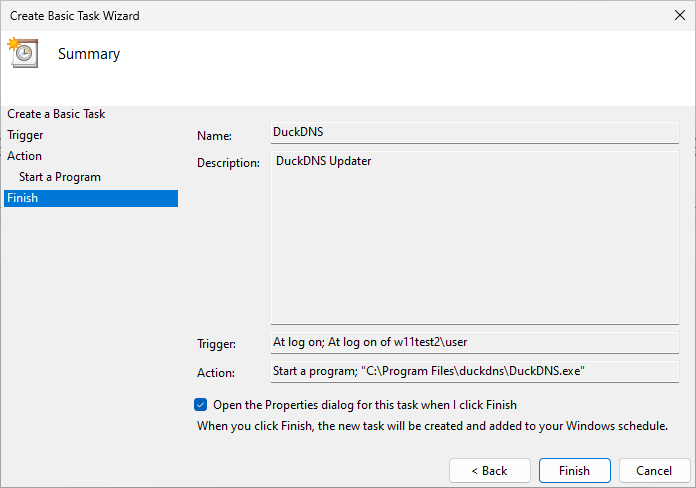
-
Check
Open the Properties dialogcheckbox and clickFinish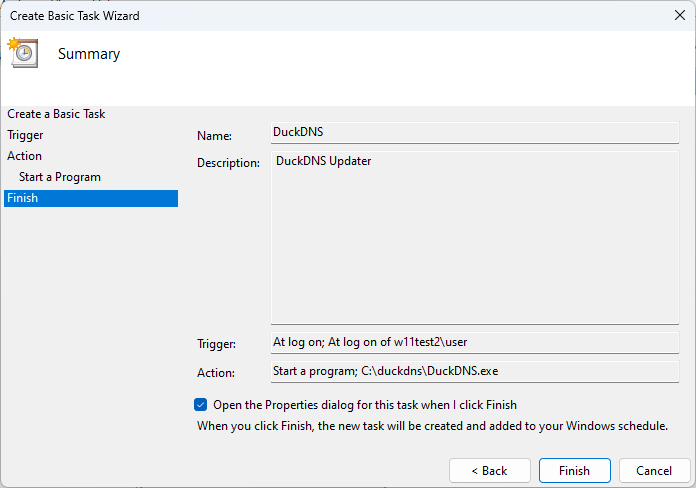
-
Go to the
SettingsPane in the dialog and uncheck theStop the task if it runs longer thancheckbox, then clickOK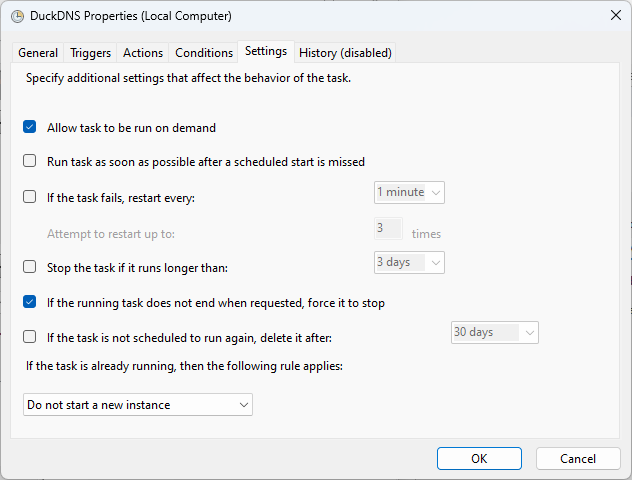
Reverse Proxy with Caddy
-
Create a text file named
Caddyfile(Remove the .txt suffix) on your computer. This file is temporary and can be anywhere. You will be asked to confirm if you want to change the file extension, clickYes.
-
Open the file in a text editor and paste in config from below depending on your needs. Replace
<your (sub)domain here>with the domain you just created with DuckDNS.-
if you want your jellyfin instance behind the bare domain (subdomain.example.com / jellyfin.example.com):
<your (sub)domain here>

reverse_proxy 127.0.0.1:8096 -
if you want your jellyfin instance under a subpath (example.com/jellyfin):
<your (sub)domain here>

redir /jellyfin /jellyfin/
reverse_proxy /jellyfin/* 127.0.0.1:8096
-
-
Save the file and close the text editor
-
Copy this file to your caddy folder (the one you created in the Install Caddy section which should be
C:\Program Files\caddy). Confirm the operation if prompted. -
If you have chosen to use a subpath for Jellyfin, go to your Jellyfin dashboard (open http://localhost:8096 on your server, click the 3 bars on the top right then select
Dashboard) and go to theNetworkingmenu on the side bar. Then enter the subpath you have chosen to use and save. Then restart the Jellyfin server (Stop then start the server from the system tray icon)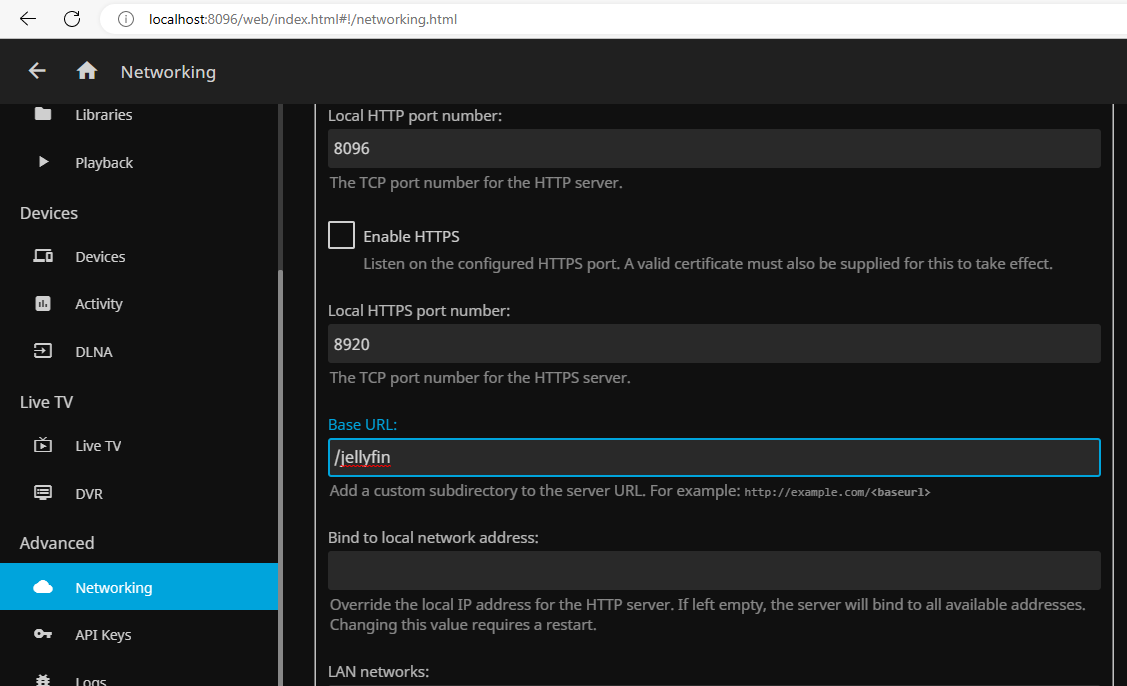
-
Open a terminal in the caddy folder and run
caddy run. If there are errors, check your configs and try again. Keep this window running. -
Go to
http://<your (sub)domain here>orhttp://<your (sub)domain here>/jellyfinin a browser to test if it is working. You should be able to see the Jellyfin Login Page. -
hit
Win + R, entertaskschd.mscand clickOK -
Click on
Create basic taskon the right panel. -
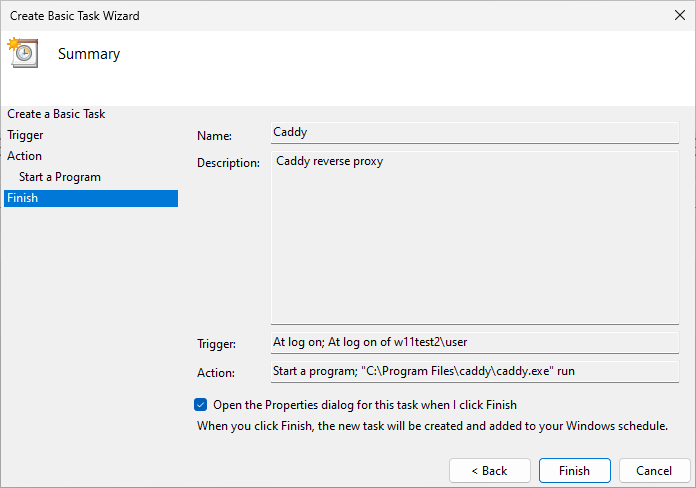
Enter a descriptive Name and a description, one that you can identify in the future and click next
-
Choose
When I log onfor the Task Trigger and click Next -
Choose
Start a programfor the Action -
Enter
"C:\Program Files\caddy\caddy.exe"in the Program/script field,runin the arguments field and"C:\Program Files\caddy"in the Start in field, then click Next. The parenthesis are required as the path contains a space. -
Check Open the Properties dialog checkbox and click Finish
-
Go to the Settings Pane in the dialog and uncheck the
Stop the task if it runs longer thancheckbox, then click OK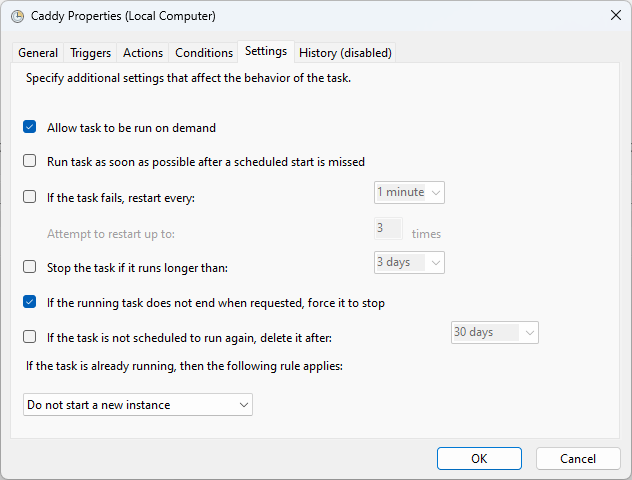
-
Reboot to test configuration. There will be a Terminal window open after bootup. This is normal. Keep this window open.
